Rainy Day Potato soup

So unlike the last recipe, which was fairly healthy, this one is not. But hey, sometimes you need something rich and comforting. I grew up with my mom making this all the time for us. I’ve updated it a little but otherwise it’s pretty much the same as she’d make it. You can use what ever potatoes you have on hand and as many as you like. I chose 1 pound because it struck a good balance, for me, between being to soupy and too much potato; but you can add as many or as little as you like and it will still work. Enjoy!
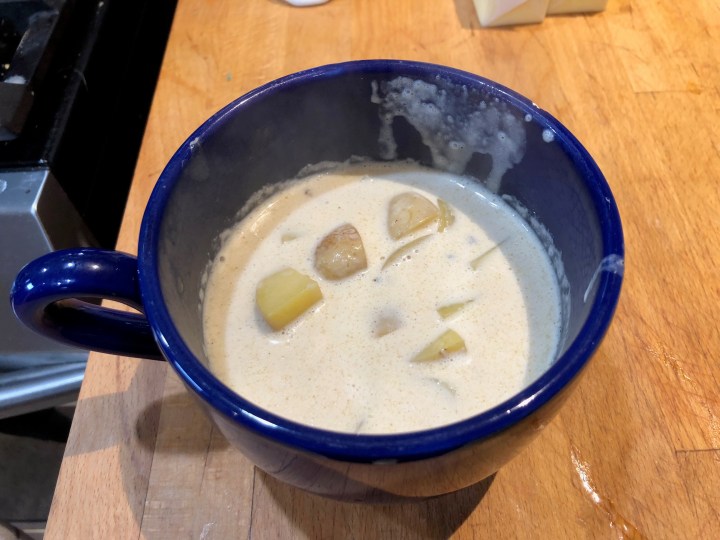
IMG_1858

Potato Soup

  • 1 lbs potatoes (I like the little golden yellow ones)
  • 3 slices bacon
  • 1 small yellow onion (I like sweet)
  • 1 clove garlic
  • 2 Tbsp olive oil
  • 2 Tbsp butter (plus 1 Tbsp optional)
  • 1 Tbsp flour
  • 3 cups chicken stock
  • 2 cups milk (or cream)

Directions:

Slice the bacon into bite size bits, about 1/16th of an inch. Add to a pot with 2 tbsp of olive oil. Brown over medium-high heat until the bacon renders somewhat.
What does render mean? When it’s nice and oily, more so than when you put it in. That means the bacon has released some of it’s fat.
Once the bacon is browned add the potato’s and cook for another 3 minutes, stirring so they don’t stick. Add onion and garlic and cook for another 2 minutes, again stirring.
Remove it all from the pot and add the 2 tbsp of butter and melt it. Once it’s melted add the flour, stirring constantly with a whisk. After 2 minutes it should be good. Slowly add the chicken stock stirring constantly. Once incorporated, add everything back in and bring it up to a boil. Once it’s boiling turn it down to low and simmer for about 15 minutes or until the potato’s are tender.
Why do this? It makes the soup a little thicker, which I like. Not as thick as some clam chowders but still thicker than how my mom would make it.
Add the milk, or in my case cream, and bring back up to a simmer. This is the point where you want to taste to see if it needs salt, I’ve never had to add any as the bacon is enough. Add pepper to taste.
Once it’s hot, it’s ready to serve. I like to add a tbsp of butter as a finish, it had a nice flavor right at the end.

Quick Chipotle Chili

My future sister-in-law brought this healthy recipe to my attention. I really like it because it’s vegan/vegetarian friendly, all you have to do it leave out the chicken, add an additional can of beans, and substitute vegetable broth for the chicken broth.

As usual, I did make some modifications. When I first made it with the recipe it came out way to watery for my tastes. I like my chili a little on the thick side.

It’s pretty quick too. Pre-cook the chicken and it’ll take about 30 minutes. I like to make this in my Instant Pot. You can sauté the veggies in it and them program it to slow cook for however long you need. I can start this first thing in the morning and have it ready for dinner by the time I get home.

IMG_1856

Chipotle Chile

  • 1 tablespoon of olive oil
  • 1 medium yellow onion, diced
  • 1 poblano pepper, diced
  • 1 red bell pepper, diced
  • 4 or so minced cloves of garlic (to taste)
  • 2 chipotles in adobo, chopped*
  • 2 cups chicken stock or vegetable stock
  • 1 chicken breast, shredded (leave out to make vegetarian)
  • 2 (15-ounce) can beans, rinsed and drained (your choice of type, I like black and pinto)
  • 1 (15-once) can of fire-roasted diced tomatoes
  • 1 (6-ounce) can of tomato paste
  • 1 tbsp cumin
  • 1 tsp ancho chili powder
  • salt & pepper to taste

Heat the oil over medium-high heat. Add onion, poblano and bell pepper and sauté for 7 minutes, stirring occasionally, until the onions are soft. Add in the garlic and chipotles in adobo and sauté for another minute, stirring occasionally.

Add in the rest of the ingredients, stir it together, and bring to a simmer. Cover, reduce the heat to medium-low, and continue simmering for another 10-15 minutes.

Enjoy!

*Why the asterisk? Chipotles are a tricky thing, you never know how hot they’ll be. So if you’re heat sensitive then you might want to start out with just one. If it’s not enough then you can add another. Or add additional Ancho chili powder.

Limoncello Cake

So this is a favorite of both myself and my friends. It’s excellent, light and not too sweet. While not horribly complicated (I think) it is a little labor intensive but so worth it in the end. I don’t remember what inspired me to create this recipe but I cobbled it together from several different sources. Oh and in posting this I realized no where did I mention, until the assembling part, that you should have Limoncello on hand although it’s implied in the recipe name. It could be optional I suppose but why?

Limoncello Cake

Lemon Curd:

  • ¾ cup sugar
  • 2 large eggs
  • ¾ cup fresh lemon juice
  • Zest of 2 lemons (or 3 if it takes that many to get ¾ a cup of juice)
  • 6 Tbsp unsalted butter (melted)

Whisk together the sugar & eggs in a sauce pan. Add juice, lemon zest & melted butter. Cook on Med Hi heat. Stir until thick, mixture should coat the back of a metal spoon*. Cool on counter, whisking occasionally, for about an hour. Finish cooling in fridge.

*OK so what the hell does this mean? Dip the spoon into the mixture. There should be a nice layer of mixture on the spoon that doesn’t immediately drip off. Run a finger down the middle. Does the line stay? Or does it immediately start to blend back down the spoon. If it stays, it’s done.

Cake:

Preheat oven to 350 degrees

  • 2 9inch cake pans
  • 2 ¼ cups of sifted flour
  • 1 ½ cups of sugar
  • 3 tsp baking powder
  • 1 tsp salt
  • ½ cup of soft shortening
  • 2/3 & 1/3 cups of milk (split)
  • 1 ½ tsp lemon flavoring
  • 2 large eggs

Sift together dry ingredients (flour, sugar, baking powder & salt). Add in shortening, flavoring & 2/3 cup of milk. Mix at medium speed for about 2 mins (may be lumpy, that’s ok). Add 1/3 cup of milk & eggs, mix at medium speed until well mixed (about another 2 mins). Divide equally into the 2 cake pans.

Bake about 30 – 35 mins in a 350 degree oven until done. How do you know it’s done? Take a toothpick and jab it into the middle of the cake. If it comes out clean & dry, it’s done. If it has cake batter on it, well then it isn’t done now is it?

Cool cakes on a cake rack. Cut each cake in half once they’re cool. No not down the middle! You don’t need 4 half circles now do you? Cut them horizontally, so you’ll have 4 layers for your cake.

Frosting/Filling:

  • 2 cups of heavy whipping cream
  • 2/3 cup of confectioner’s sugar (that powdered sugar)
  • 16 oz of mascarpone cheese (at room temp)
  • 8 oz of cream cheese (at room temp)
  • 1 ¼ cups of lemon curd (that the first thing you made, just use it all)

Place a large mixing bowl and wire whip beaters in the freezer for 10 minutes. Really this makes the whip cream come out better. Beat the cream until stiff. How do you know when it’s still? Pull out the whisk. There should be a “peak” of whip cream off the end. Does it sag? If not, then it’s stiff.

Slowly add the sugar and continue beating until stiff again. It doesn’t take long.

In a separate bowl beat the mascarpone cheese & cream cheese together until smooth. NO LUMPS! Add the lemon curd and beat some more until that’s smooth. Now add this to the whipped cream mixture and beat until smooth.

Assemble the Cake:

Place the first layer of cake, cut side up on a plate. Pour Limoncello onto the cake, sparingly you lush! You want an even coverage but not have it sopping wet.

Slap on a layer of frosting. Only on the top, don’t bother with the sides yet. Repeat until you’ve done this with all the layers. Once you’ve got the top layer on, now you can frost the sides.

Cake is best if you refrigerate it for several hours before serving.

Welcome to my blog!

For years I’ve been known among family and friends for my various dishes, particularly desserts. So I’ve decided to start a blog to share some of the recipes and my adventures in cooking. Most of what I make is based on common recipes from the internet, cooking shows, etc. But like many, I customize them to make them uniquely my own. I hope you enjoy them as much as I have.