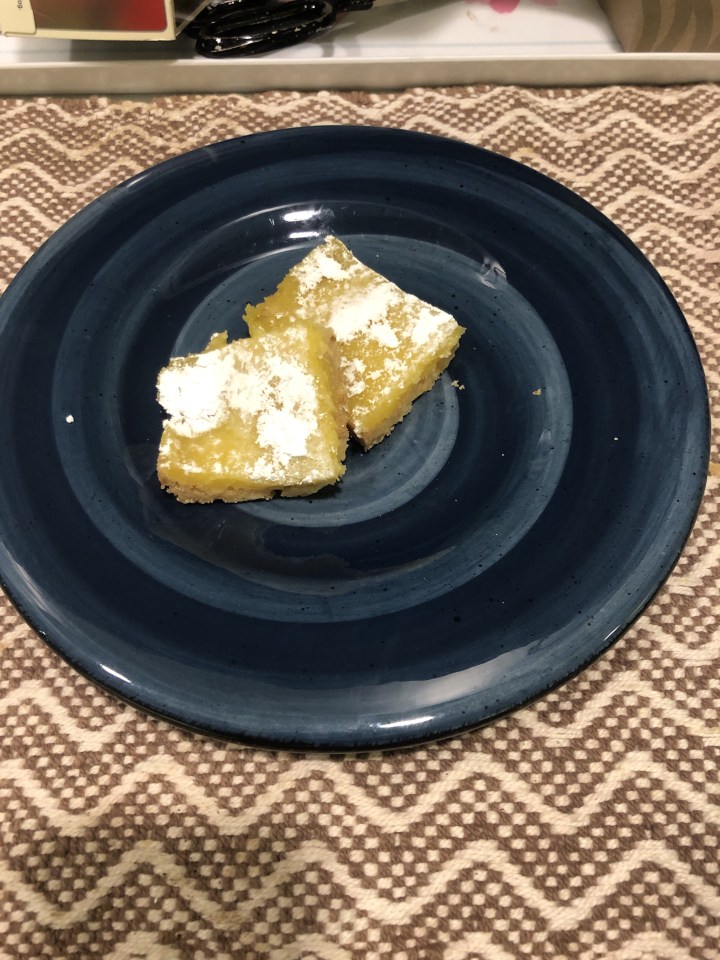
Lemon Pound Cake

So I was having dinner with a couple of friends and since they were doing the cooking I figured I’d make dessert. Plus it’s really my specialty. I asked them what do you want? The answer, lemon pound cake. I was like, ok. I just made the key lime pound cake so making this kind of cake was pretty fresh in my memory. I consulted my good friend, Google, found a couple of recipes and decided on this on. With some modification, of course. And for the frosting, I really like a cream cheese frosting. Since this was lemon, I decided to bump it up several notches. I added in a little lemon curd, which I had leftover from making my Limoncello cake recipe. Enjoy!

Lemon Pound Cake

  • 1 1/2 cups all-purpose flour
  • 1 tsp baking powder
  • 1/2 tsp kosher salt
  • 2 sticks of unsalted butter (1 cup), at room temp
  • 1 cup sugar
  • 4 eggs, at room temp
  • 1 tsp real vanilla extract
  • 1 tsp lemon extract
  • 1 lemon, zested and juiced

Directions:

Shift together the flour, baking powder and salt. Zest in the lemon.  In a mixer, I like to use my Kitchenaid stand mixer with the paddle attachment, cream the butter until light and fluffy. Lower the speed and slowly add in the sugar. Mix until combined and again, fluffy. With the speed still lowered, add the eggs one at a time. Mix until well combined. Add in the extracts and lemon juice, which should be about 1/4 cup of juice. Add in the flour mixture and mix until it’s just combined, don’t over mix it our the cake will come out too dense and tough.

Pour into a parchment lined loaf pan that’s been sprayed with non-stick cooking spray.

Bake in a 350° oven for 50-60 minutes or until a skewer comes out of the center clean.

Frosting

  • 1 8 oz package cream cheese, at room temp
  • 1/2 cup lemon curd (you can find the recipe here)
  • 1 cup powdered sugar

Directions:

In a bowl with a hand mixer, beat the cream cheese until it’s smooth. Add in the lemon curd and beat again until smooth. Lower the speed and slowly add in the sugar, beat until smooth. Frost the loaf of cake and refrigerate. This frosting is somewhat loose but very tasty.


Raspberry Cream Cheese Brownies

So I wanted something to take to a party recently. As raspberries are in season, I thought, lets make something with them. I’ve had this recipes in my to do pile for about 7 years. I thought now is a good time to give it a try. The only change, really, that I made to the original recipe was to add both Chambord liqueur and fresh raspberries. The original only called for raspberry jam. They turned out super moist and gooey, delicious. Enjoy!


Raspberry Cream Cheese Brownies

  • 8 oz cream cheese, at room temp
  • 1 1/2 cups sugar (divided 1/4 and 1 1/4)
  • 1 egg yolk plus 3 eggs
  • 1 tsp real vanilla extract
  • 2/3 cup all-purpose flour
  • 1/2 tsp baking powder
  • 1/2 tsp kosher salt
  • 1 stick unsalted butter, cut into chunks
  • 4 oz unsweetened chocolate, chopped
  • 1/2 cup raspberry jam
  • 1/2 pint fresh raspberries (don’t use frozen)
  • 4 tbsp Chambord liqueur (divided 2, 1, 1 tbsp)

Directions:

Preheat your oven to 350°. Spray an 8″ square baking pan with non-stick cooking spray. I like to line mine with parchment paper to make it easier to get the brownies out. You can also use foil but it you do make sure to spray the foil as well.

Beat together the cream cheese, 1/4 cup sugar, egg yolk, 1/2 tsp vanilla and 1 tbsp Chambord until smooth. Set aside.

Sift together the flour, baking powder, and salt. Use a microwave-safe bowl and nuke the chocolate and butter until smooth and melted; use 20 second increments to do this. Whisk in 1/4 cup of raspberry jam and 2 tbsp Chambord until smooth. Add in the remaining sugar, eggs and 1/2 tsp of vanilla. Fold in the flour mixture until just combined, you don’t want to over mix it.  Pour 1/2 of the batter into the baking pan.

Take the remaining raspberry jam and nuke it for about 20 seconds. Add in the fresh raspberries and remain tbsp. of Chambord. Gently stir to combine, you don’t want to crush the fresh raspberries too much.

Dollop the cream cheese filling over the brownie batter and gently spread out, try to create an even layer. On top of that dollop the jam mixture randomly across the top of the cream cheese. Cover with the remaining brownie batter and gently spread out evenly. Bake for 60 minutes or until a knife inserted in the center comes out fairly clean.

Coconut Chocolate Pie

I made this recipe as a follow up for my Hawaiian friend who had a birthday. I figured, why only celebrate once? It was one of the recipes suggested by my friend, Google. I only modified it slightly. Instead of using a store bought pie crust, I used the recipe I’ve posted before in my Dutch Apple pie for the crust.  I really liked that the coconut flavor was subtle, not in your face. Enjoy!


Coconut Chocolate Pie

  • 1 pie crust
  • 1 cup whole milk
  • 1 14 oz can coconut milk
  • 1 cup sugar
  • 1 cup cold water
  • 1/2 cup cornstarch
  • 1 1/4 cups chocolate chips
  • 1 cup heavy cream
  • 1/4 cup powdered sugar
  • 1/4 cup creme de cocoa liqueur, divided in half

Directions:

Bake the pie crust in a 350° oven for 15 to 20 minutes or until golden brown. You want to poke the bottom and sides with a fork first.  I weight mine down with parchment paper and some old dried beans. This prevents it from puffing up but can take longer to bake. Allow to cool completely.

In a medium pan; whisk together the milk, coconut milk and sugar. Bring to a boil over medium-high heat then reduce to low. Combine the corn starch and cold water, I like to use a jar for this. Shake well until it’s mixed (no lumps of cornstarch). Slowly pour into the milk mixture, whisking constantly. Continue stirring until it thickens, about 3 to 5 minutes.

Use a microwave safe bowl and nuke the chocolate in 20 second interval, stirring between, until the chocolate is melted and smooth. Add in 1/2, or 2 Tbsp, of the cocoa liqueur.

Divide the milk mixture evenly, I like to use 2 identical liquid measuring cups for this. Add the chocolate to one of them. Pour one of the mixtures into the cooled pie shell and smooth out. The original recipe called for the chocolate first but I missed that and poured the coconut first, I don’t think it really matters but I liked the light/dark/light layering. Pour the second mixture and gently smooth out. Refrigerate for at least an hour, longer is better.

Place a mixing bowl and beaters, or whisk attachment if using a stand mixer, in the freezer for 15 to 20 minutes. Once cold, beat the heavy cream until soft peaks form. Add the powdered sugar and remaining cocoa liqueur and beat until stiff peaks form. Spread on top of the pie and serve.

Dulce de Leche Pie

So I was requested (more like a demand) that I make a Dulce de Leche recipe. I was pretty sure what was wanted was actually a tres leches cake but that’s another story (turned out I was right). I’ve modified it a bit, like most recipes I make, and I think it turned out pretty good (or so I heard since I didn’t get any). The original recipe called for white chocolate and I didn’t think that really paired well with the leche. The crust is based on the recipe I posted earlier for dark cocoa cookies. Just let them dry out for a day or too. And an added bonus? There’s not baking involved. Enjoy!

7ac48567-3491-4887-bd4d-2056bbefef3a.jpg

Dulce de Leche pie

Crust:

  • 14 to 16 oz of dark cocoa cookies, crushed (amount depends on your pie tin size)
  • 8 Tbsp melted butter

Filling:

  • 10 Oz chocolate chips
  • 1 cup heavy whipping cream
  • 1 cup powdered sugar
  • 8 oz cream cheese, at room temp
  • 1 cup dulce de leche (I make my own)

Topping:

  • 1 cup heavy cream
  • 1/2 cup powdered sugar
  • 1 Tbsp chocolate vodka or liqueur (optional)

Directions:

Pulse the cookies in a food processor until fine. Add the melted butter and mix well. Pour into a pie tin and press firmly into the button and up the sides to create a thick crust. Chill.

Place a mixing bowl and beaters, or whisk attachment if using a stand mixer, in the freezer for 10 to 15 minutes.

Using a microwave-safe bowl, melt the chocolate by nuking for 20 seconds at a time; stirring in-between until it’s completely melted and smooth. Beat the cream cheese until smooth. Add the melted chocolate and beat again until smooth. Add the dulce de leche and beat again, until smooth.

Take the bowl out of the freezer and beat the heavy cream until it starts to form peaks. Add in the powdered sugar and beat until stiff peaks form. Fold into the cream cheese/chocolate/leche mixture until well combined. Pout into the pie shell and refrigerate for 4 to 6 hours, or until set.

Before serving; put a mixing bowl and beaters, or whisk attachment if using a stand mixer, in the freezer for 10 to 15 minutes. Beat the heavy cream until soft peaks start to form. Add the powdered sugar and chocolate vodka, if using, and beat until stiff peaks form. Spread on top of the set pie and serve.

Lilikoi Bars

A friend of mine recently had a birthday. She’s the tasting room manager for Rotie Cellars, one of the best wineries in Washington if I may say so. I stopped by the weekend of her birthday and brought key lime pound cake (a recipe I previously posted). Unfortunately she was off enjoying herself. So I decided to make her something special for when she returned. Being Hawaiian, I figured a Hawaiian dessert was in order. My friend Google suggested several things but I liked this dessert. It’s similar to a lemon bar but is made with lilikoi, which is passion fruit. I had no idea what a challenge it would be! I had to go to at 7 different stores in Seattle that where known for Hawaiian foods. The first 5 had nothing, the 6th had passion fruit from concentrate in a can and finally the 7th had frozen passion fruit juice with seeds. It turned out really well and needless to say my friend was really touched. Enjoy!

Lilikoi Bars

Crust

  • 2 sticks unsalted butter at room temp
  • 1/2 cup sugar
  • 2 cups all-purpose flour
  • 1/2 Tsp kosher salt

Filling

  • 6 large eggs at room temp
  • 2 cups sugar
  • 1 cup lilikoi (passion fruit) juice, fresh would be best but good luck finding it.
  • 1 cup all-purpose flour
  • 1 lemon, juiced and zested
  • 1/4 Tsp cream of tartar

Glaze

  • 1/4 cup water
  • 1/2 cup sugar
  • 1/4 cup lilikoi juice
  • 1/2 lemon, juiced

Directions:

Preheat the oven to 350°. In a stand mixer with the paddle attachment on medium speed, cream together the butter and sugar until light and fluffy. Combine the flour and salt and add to the butter mixture with the mixer on low speed until just combined. Dump the dough into a 9″ x 13″ baking pan and press it along the bottom and about 1/2″ up the sides.  Refrigerate for 30 minutes. Bake the crust for 15 minutes, remove to cool slightly (leave the oven on). While it’s cooling, whisk together the eggs, sugar, lilikoi juice, lemon zest & juice, cream of tartar, and flour. Pour over the crust and bake for 30 minutes or until the filling is set. A knife inserted in the middle should come out fairly clean. Allow to cool.

To make the glaze, bring the 1/4 cup of water and 1/2 cup of sugar to a boil stirring to dissolve the sugar. Turn down to medium heat and cook for 5 minutes. Add the lilikoi and lemon juice, boil for another 3 minutes. Allow to cool and drizzle over the lilikoi bars.

Dark Cocoa Cookies

So I had a request to make a Dulce de Leche dessert. I gave it some thought, consulted my friend Google, and came up with the idea of a pie. The recipe I found, which I’ll post later, wasn’t exactly what I wanted so I modified it extensively. But one of the things it called for was ground up Oreos for the crust. Unfortunately it called for them WITH the filling, which I thought sounded awful (and way too sweet). So I decided to make my own but more in the style of Paul Newman’s tops & bottoms.  I found this recipe, which is one of the few I haven’t modified really, and they turned out exactly how I wanted. No, in fact, better than what I wanted. Unlike the above mentioned, they were just a tiny bit moist. Well until I let them dry out for my pie. The key is GOOD cocoa. Don’t go buy cheap stuff, like Hershey’s, but true Dutch processed cocoa. The darker the better! Enjoy!


Dark Cocoa Cookies

  • 1 1/4 cups butter at room temp
  • 2 cups powdered sugar
  • 1 cup Dutch processed cocoa
  • 1/2 Tsp kosher or fine salt
  • 1 Tsp real vanilla
  • 1 1/2 to 1 3/4 cups flour

Directions:

In a stand mixer with the paddle attachment, cream the butter and sugar together on medium speed until light and fluffy. Turn down to low and add the cocoa a little at a time, careful it’s very powdery and will fly everywhere if you’re not careful. Once incorporated, add the salt and vanilla, mix until combined. Add the flour 1/2 cup at a time. And each time you want to mix it until all the flour is incorporated. Mix until the dough is mostly dry and crumbly. It’s a fine line here, you don’t want it too moist because you want a crisp cookie; but you don’t want it too dry either. It should stick together but not be sticky at all. Divide it into 2 disks, wrap in plastic wrap, and refrigerate for 15 minutes. You want it cold but not so cold it won’t roll out. If it goes longer that 15 minutes then let it warm up at room temp for 15 minutes before trying to roll it out.

Preheat your oven to 350° and line 2 cookie sheets with parchment paper. Roll out the dough to about 1/8″ thickness. Again not to thick, you want a crisp cookie after all. I used a couple of pieces of waxed paper and sandwiched the dough between them so it wouldn’t stick. Use a 2″ circle cutter, like a biscuit cutter, to cut out the cookies.

Bake for 8-9 minutes. It’s almost impossible to tell when they’re done because they’re so dark but you should be fine as long as you stick to this range. You may need to adjust slightly depending on your oven. Better a little underdone and needing to be popped back into the oven for a minute or two than over done and burnt.


Key Lime Ice Cream

Ok now that I’ve found key limes, I’ve been on a kick. I asked my friend, Google, for key lime ice cream recipes and for once he pretty much failed me. I found 1 and it used limeade!, corn syrup, buttermilk, and sweetened condensed milk. I did not care for the sound of that. So I decided to make up my own recipe. It’s based on a simple, no-cook, vanilla ice cream recipe. I think it turned out pretty good. Enjoy!

d26d8926-34ab-4f10-9af6-00d7e38066c5.jpg

Key Lime Ice Cream

  • 1 Tbsp key lime zest
  • 1/2 cup key lime juice (this takes a pound or more of lime)
  • 1/4 cup key lime liqueur (optional but it added a lot of flavor)
  • 1 1/2 cups whole milk
  • 3 cups heavy cream
  • 1 1/8 cup powdered sugar
  • 1/2 Tsp vanilla

Directions:

Zest enough of the limes to get about 1 Tbsp of zest, more if you want more lime flavor. Juice the limes until you get 1/2 cup. Combine the zest, milk and powdered sugar. Beat until the sugar dissolves, this is why I used powered sugar as it dissolves easily. Add the heavy cream, lime juice, vanilla, and key lime liqueur. Beat to combine.

Put it in the freezer for about 20 minutes, this will give it a head start when you put it in your ice cream maker. I have a small Cuisinart ice cream maker, it cost me $35 at Costco and has more than paid for itself. Mix until it solidifies, put it in containers and freeze until firm.

Raspberry Cream Cheese Coffee Cake

I came across this recipe on the internet, like a lot of recipes I make, and thought it sounded good. Like most recipes, I’ve changed it up a bit; added some lemon and fresh raspberries (the original only called for jam). It’s still a work in progress, I’m not totally happy with the crumble topping. But all and all it turned out pretty tasty. I also liked that is wasn’t super sweet. Enjoy!

Raspberry Cream Cheese Coffee Cake

  • 2 1/4 cups all-purpose flour
  • 1 cup sugar, divided 3/4 and 1/4
  • 3/4 cup unsalted butter plus 2 Tbsp
  • 1/2 Tsp baking soda
  • 1/2 Tsp baking powder
  • 1/4 Tsp kosher salt
  • 3/4 cup sour cream
  • 2 eggs
  • 1 8oz package cream cheese, at room temp
  • 1 Tsp lemon extract
  • 1 lemon, zested
  • 1 cup raspberry jam
  • 1 pint fresh raspberries

Directions

Pre-heat your oven to 350°. In a food processor; pulse the flour, 3/4 cup sugar, lemon zest, and butter until it’s crumbly. Sort of like making pie dough. Set aside 1 cup for the crumble topping. Combine the remaining mixture with the baking powder, baking soda, salt, sour cream, 1 egg and lemon extract. You’ll probably want to switch to a bowl and use a hand beater for this. The batter will be really thick! Spread it evenly into a lightly greased 9″x13″ baking pan. It’ll be a challenge because it’s thick. Don’t worry if it isn’t super even.

In another bowl beat together the cream cheese, 1/4 cup of sugar and 1 egg until smooth. I recommend beating the cream cheese and sugar first, then add the egg. Pour this mixture over the batter and smooth out. Dollop the jam into the cream cheese mixture and sprinkle the fresh raspberries across the top as well. I don’t recommend using frozen raspberries and they tend to be too “wet”.

Take the 1 cup of flour mixture that you set aside and combine with 2 Tbsp of room temp butter. Crumble this across the top of the cake. Bake for 1 hour or until the top is golden brown and a knife inserted in the middle comes out clean.

Key Lime Pound Cake with Key Lime Cream Cheese Frosting

So a friend of mine posted this recipe to my Facebook page, suggesting I give it a try. And clearly he wanted some key lime pound cake. I was totally up for the challenge. The first challenge was finding key limes! Being in the Pacific NW, they’re not as readily available as one might think! So after consulting the hive-mind of Facebook, I found them at QFC. I picked up a 1lbs bag and off to the kitchen I went. I did modify the original slightly, cut down the sugar for one. Also I added a little key lime liqueur. It turned out delicious. However I will be modifying the frosting recipe in the future. It’s good but I’d like it to have more lime flavor. Enjoy!

Key Lime Pound Cake

  • 4 sticks unsalted butter at room temp (hence the name, pound cake)
  • 2 1/4 cups sugar
  • 6 large eggs at room temp
  • 4 cups all-purpose flour
  • 1 lbs fresh key limes, zested and juiced
  •  1/4 cup sweetened condensed milk
  • 1/4 cup key lime liqueur
  • 1 Tsp real vanilla extract

Directions:

Preheat your oven to 300°. Spray 2 loaf pans with non-stick cooking spray.

Using a stand mixer on medium-high, beat the butter and sugar until light and fluffy, about 5 minutes. Lower the speed to medium and add the eggs one at a time and beat until incorporated. Don’t worry if it starts to look like cottage cheese. Add the juice, milk, zest, vanilla and key lime liqueur and beat until combined.

Lower the speed to medium-low and add the flower 1/2 cup at a time. Beat until light and fluffy again, shouldn’t take more than 2-3 minutes. Pour evenly into the bread pans. I like to line mine with a little parchment paper as it makes taking them out so much easier. Bake for 1 hour and 20 to 30 minutes or until a skewer comes out clean.

Key Lime Cream Cheese Frosting

  • 2 8 oz packages of cream cheese at room temp
  • 4 Tbsp unsalted butter at room temp
  • 1 1/4 cups powdered sugar
  • 1/4 cup key lime liqueur
  • 1 Tsp real vanilla extract

Directions:

In a stand mixer with the whisk attachment, beat the cream cheese and butter on high until light and fluffy. Lower the speed to medium and add the powdered sugar 1/2 cup at a time. Beat until well combined. Add the key lime liqueur and vanilla, beat until well combined. Frost the tops of the cooled loafs and serve.

Raspberry Lemon Breakfast Rolls

This recipe is adapted from one from Food and Wine. I upped the lemon factor in it by adding both lemon extract and Limoncello. Enjoy!

Raspberry Lemon Breakfast Rolls

Dough:

  • 1 cup whole milk
  • 2/3 cup sugar
  • 1 1/2 Tbsp active dry yeast
  • 1 stick unsalted butter, at room temp
  • 2 large eggs
  • 1 lemon, zested
  • 1/2 Tsp kosher salt
  • 1/2 Tsp lemon extract
  • 4 1/4 cups (or so) all-purpose flour, plus more for kneading.

Filling:

  • 1 heaping cup fresh raspberries
  • 1/3 cup sugar
  • 1 lemon, zested
  • 1 Tbsp cornstarch
  • 1 stick unsalted butter, at room temp
  • 1/2 cup raspberry jam
  • 2 Tbsp Limoncello

Glaze:

  • 1 1/2 cups powdered sugar
  • Juice of 1 lemon or 2-3 Tbsp of Limoncello

Directions

Nuke the milk until it’s between 100° to 110°. In a stand mixer with the paddle attachment; add in the milk, yeast and sugar. Stir to dissolve the yeast. Let sit for 5 to 7 minutes, it’ll become foamy. On low-speed add in the butter, eggs, lemon zest, salt, and lemon extract. Slowly add in the flour, about 1/2 a cup at a time. Beat for about 2 minutes. The dough will be sticky. You want it to start to pull away from the sides of your bowl. You may need more or less flour, depending on your conditions (humidity, etc.). Once it starts to pull away switch out the paddle attachment for a dough hook. You may have to scrap down the sides of the bowl.  Beat on medium speed for 10 minutes. Turn out onto a lightly floured board and knead for about 2 minutes. It should be soft and slightly sticky. Place in a large glass bowl sprayed with non-stick cooking spray. Spray the top of the ball of dough as well, cover with plastic wrap, and set in a warm location to rise. It should double in 1 to 2 hours.

In a medium bowl toss the raspberries, sugar, lemon zest, cornstarch and Limoncello. Add in the raspberry jam.

Once the dough has risen, turn it out on the floured board and roll out to a roughly 10×20″ rectangle. Spread the butter over the dough and then spread the raspberry mixture over that.

Starting with the long edge, roll the dough into a 20″ log. Take a 9×13″ pan and spray with non-stick cooking spray (or you can butter it is you want the additional flavor). Cut the dough into roughly 2 to 2.5″ slices and put them cut side down in the pan. Raspberry will inevitably ooze out, scoop it up and put in on top of the rolls. It’ll be fine.

Cover with plastic wrap and let rise again for an hour or so. Don’t worry if the rolls don’t fill the whole pan, they will after they rise.

Preheat your oven to 400° and bake for 20 to 25 minutes or until the tops are golden brown and the juice are bubbly. Allow to cool for at least 30 minutes.

In a small bowl, whisk together the powdered sugar and lemon juice (or Limoncello). Add the juice a little at a time, you don’t want your glaze to be too funny. Drizzle over the tops and enjoy!